
This a reversible bib that I made using a fun fabric and a coordinating color in terry cloth. It actually fairly simple and doesn't take too much time to make either. I also made matching burp cloths with the same fabrics. I will post on those in a couple of days. Here are the bunch...
Update: Check out coordinating Burp Cloths here.

Click Read More for How I Did It...
1/2 yard Fun Fabric
1/2 yard Terry Cloth in coordinating color
*Fabric will yield 2 bibs and 2 burp cloths
Bib for template
Scissors
Straight Pins
Velcro Squares
Sewing Machine and Thread
How I Did It
1. I laid out my fabric (1/2 yard) and cut it in half lengthwise. (The long way, that would be 9 inch sections since it is 1/2 yard of fabric.) I did this for both the terry cloth fabric and the fun fabric.

3. I made sure that my fun fabric was facing 'fun side up' and the terry cloth fabric on top. I then laid my bib template on top of both of them and cut around the bib, leaving approximately 1/2 to 3/4 inch* all the way around. If you are an experienced sewer and trust that you can leave only 1/4 inch and not make any mistakes, go for it. I, however, do not trust in my abilities. lol. I always end up trimming afterwards. I'm not sure that leaving extra room will really help me if I do make a mistake, it just makes me feel better.
4. I cut a piece of the fun fabric that will be attached to the terry cloth side of the bib. It's rather large but better than not big enough, right?

5. I placed the fun fabric 'fun side down' toward the bottom of the terry cloth section of the bib, approximately 3 1/2* inches from the bottom.

5. I stitched it across to attach it.

6. I folded it upward so that the fun side was now showing.

7. I stitched along the folded edge, approximately 1/4* inch from the fold. I didn't take a picture of this particular step but you can see it in the picture of step 8.
8. I, then folded the top edge down under the top so that the top folded edge was approximately 1 1/2 inches* from the neckline of the bib.

9. I stitched along that fold as well at approx. 1/4 inch from the fold.

10. I placed the fun fabric, 'fun side down' on top of the terry cloth (side with fun fabric strip).

11. I stitched along the outside edge, attaching both bib sides together, approximately 1/4 inch from the edge. *****NOTE: I left a 3 inch opening at the bottom of the bib. Very important!!!*****

12. I cut slits along the neckline so that when turned right side out, it would lay nice. Get close to stitch line but don't go too far...

13. I trimmed my corners so that my corner wouldn't be too bunchy.

14. I turned my bib nice sides out.

15. I folded the fabric from my opening inward.

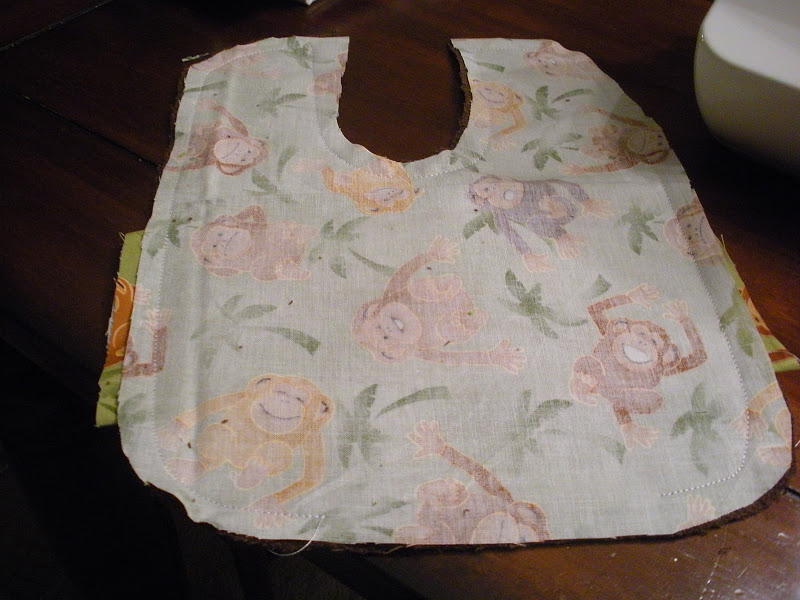
16. I stitched around the entire bib, approx. 1/4 inch from the edge.


Viola~


*Please note that these are approximations, not an exact measurements. I eye-balled it until I felt that it looked good.
No comments:
Post a Comment