
I think I want one for myself. I am definitely thinking that working with minky fabric on that large of a scale is NOT going to happen. This was relatively a simple project to start with. I would not say that it was easy but it was manageable. I only had one minor defect and I am not saying where it is at. =)
My inspiration: www.howdoesshe.com
Minky tips: www.sew-much-ado.com
Click Read More for How I Did It...
1 fitted crib sheet
1 yard Minky fabric in a coordinating color
Coordinating Thread
Sewing Machine
Straight Pins
Scissors
How I Did It
1. I cut a fitted crib sheet along the seams. I folded in quarters and approximately 22 inches from the two folded sides. This made approximately a 44 x 44 square when unfolded. Sorry, I have no pictures!! This square was no where near perfect but it worked for what I needed. This less than perfect square will be remedied later.
2. I laid out the minky fabric, right side up.

3. I laid my crib sheet fabric, right side down, on top of the minky fabric.

4. I trimmed the minky fabric, slightly larger than the less than perfect square of the crib sheet fabric. This is not an exact science...yet...

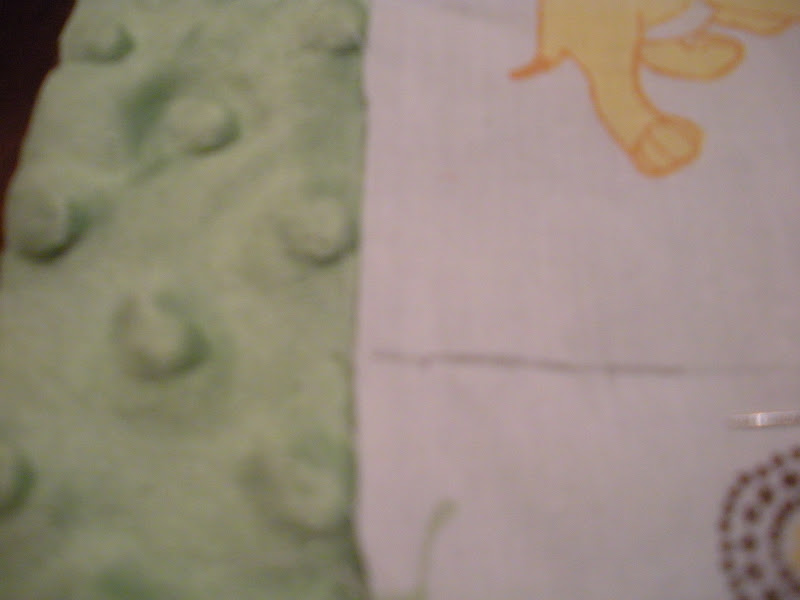
5. I used a straight edge and pencil, I marked lines along all four sides. The dots of the minky fabric were extremely helpful in lining up the lines straight.

6. I began pinning. I smoothed out the fabric and pinned. I smoothed out the fabric some more and pinned some more. **See suggestion at end of post for next time.**

8. I pinned all the way around the (now perfect-ish) square. I left approximately a 6 inch opening at the center of one side. This opening will be needed to turn the blanket right sides out. **See suggestion at end of post for next time.**

9. I trimmed excess fabric about an inch from my pencil line.


13. I performed the same pinning routine once again. Pinned, pinned and pinned some more. Pinned all the way around the blanket. I folded the edges in and pinned the 6 inch opening.
14. I sewed around the edges, approximately 3/4 inch from the edge.

15. I sewed around the blanket one more time in between the first stitching and the edge. (This might be to correct a small defect but I will never tell...)


'After the fact' suggestion that I will try next time...
I will pin one side at time and sew before moving to the next side. This way when the crazy minky fabric moves or I don't have it pinned just right, I can re-adjust before pinning and sewing the next side. I think this will help and eliminate my slight defect. Since I allowed for excess to trim, if the fabric slightly slightly, it shouldn't be a problem.
No comments:
Post a Comment