
As promised, I made some coordinating accessories for my first My First Tote Bag and My First Purse. First, I tackled a wristlet. Check back tomorrow for a post on a checkbook cover! I did create my own pattern for this. I wanted the size to be 4x6 inches and I thought it was the perfect size for my needs. I accented with the same ribbon as both the tote and the purse and used 2 ribbons sewed to each other for a strap. Since I am very new to sewing anything that isn't piecing blocks together, I tried to make this simple as possible until I get more practice. I'm loving that I have coordinating accessories! Who doesn't want to coordinate?
Click Read More for tutorial.
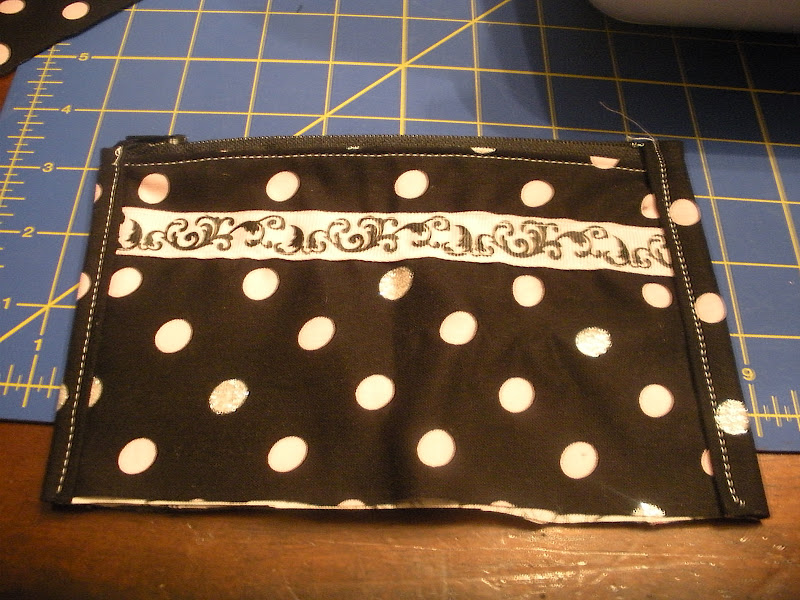
Accent fabric from Tote and Purse - Polka Dot Fab
2 - (4.5 x 6.5) inch pieces for outer shell
2 - (2 x 4.5) inch pieces for side bindings
1 - (2 x 6.5) inch pieces for bottom binding
Lining Fabric from Tote and Purse - Paris Fab
2 - (4.5 x 6.5) inch pieces for lining
Accent Ribbon - (I used two different ones because I was lucky enough to find two different ones!)
6 inch coordinating zipper

How I Did It
1. I attached accent ribbon to outer shell: I pinned the ribbon straight across the fabric approximately 1.25 inches down from the top of the fabric and stitched across the top and bottom of the ribbon.


2. I attached the zipper:
a. I laid the outer shell fabric piece over top of a lining piece that was facing down.

b. I laid the zipper, nice zipper side down, at the top of the outer shell piece, just above the accent ribbon.
c. I pinned the zipper into place. The pinning included the zipper, the outer shell and the lining.
d. I stitched across, attaching the zipper, I aimed for between 1/8th and 1/4th of an inch from edge (closer to 1/8th).


e. I flipped the zipper upward.

f. I stitched across on the fabric as close to the edge as possible. (Yes, I forgot to take a picture.)
g. I turned the piece upside down and lined up the zipper to the top edge of the two remaining fabrics. I pinned and stitched across as I did when I attached the the zipper to the first two pieces.

h. I finished off attaching the zipper by stitching a line across the top of the fabric along the zipper.


3. I attached side bindings:
a. I folded the pieces together so that the zipper was at the top.
b. I laid out a side binding fabric piece, face down, along one side of the soon to be wristlet so that the fabrics all lined up. I made sure that about a quarter of an inch hung over the top of the zipper line.

c. I folded the zipper line side in so that the material fold would be just below the zipper line and pinned the fabrics into place.

d. I stitched across and opened up the fabric.

e. I flipped the piece over.

f. I folded the extra fabric...down once approximately a quarter inch...

g. I folded the fabric...down for the second time until the fabric met with the rest of the fabric...

h. I folded the fabric...down a third time, pinned and stitched across...


i. I repeated steps a-h to attach the other side binding.
4. I attached the bottom binding:
a. I laid the bottom binding piece on top so that the edges of the fabric were lined up at the bottom. The fabric hung over the sides by approximately a quarter inch on either side.
b. I turned in the edges, pinned and stitched the piece in place.

c. I flipped the piece over.
d. I folded the extra fabric in twice and over top of the wristlet, pinned and stitched across to complete the wristlet. (I got so excited that I forgot to snap a few pics!)

5. No! I was not finished! I made and attached a strap:
a. I cut two separate ribbon pieces, 11 inches in length.

b. I placed both ribbons back to back, pinned them together and stitch down each side.
c. I, then, folded the ends under and attached the strap at an angle in the top corner of the wristlet on the side where the zipper is when in the closed position.


No comments:
Post a Comment