
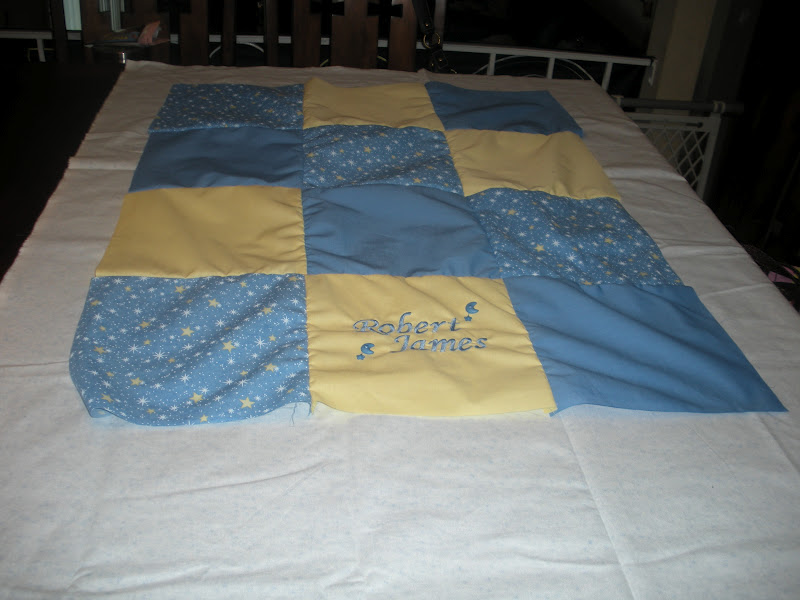
I made this for a friend who is expecting. I'm pleased with the way it turned out. It has a few small flaws but that's to be expected (from me) and it just gives it character, right?! =)
Materials
12 - 9 inch blocks, I used 4 blocks of three different, coordinating fabrics
Coordinating flannel fabric for the backing
crib sized batting
9 inch block template
Rotary fabric cutter
Cutting Mat
Sewing Machine / Embroidery Machine
Tear away stabilizer for embroidery
Accent Buttons
Thread
Scissors
Iron
How I Made It
1. I cut 4 - 9 inch blocks of three different, coordinating fabrics using a template, rotary cutter and cutting mat.

2. I ironed each block after cutting.

3. I set my machine up to embroider the name using the embroidery tear away stabilizer. (I used my Generations Software to set up my design.)
.jpg)


4. I seemed to have forgotten a picture. I added two accent buttons. I found these great moon and star buttons that matched perfectly!
5. I sewed blocks into 4 rows of three, see pattern below.

6. I sewed each row together.

7. I took my coordinating flannel fabric and laid it out on the table and laid the front piece on top. I was then able to cut the backing leaving approximately 3 inches on every side.


8. I laid out the crib sized batting and laid the front piece on top of it. I cut the batting approximately one inch larger than the front piece. (The crib sized batting is large enough to use for two baby sized quilts. Just my luck I know someone else who is pregnant!)


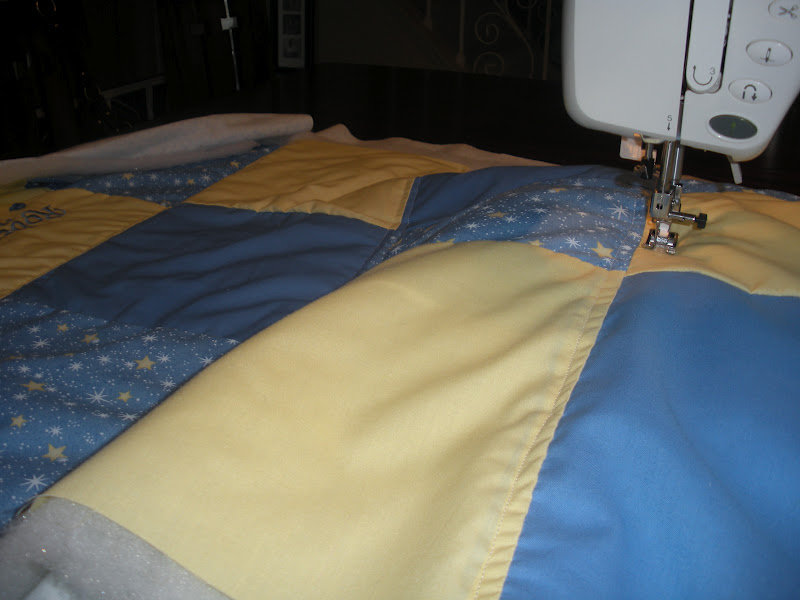
9. I laid out the backing (upside down) then the batting and lastly, the front piece. I pinned all three layers together.

10. I sewed straight lines on either side of all the existing seams on the front piece. This part is quite tricky. You must pay very close attention that the underside does not bunch. I still have not mastered this. Practice makes perfect, right?


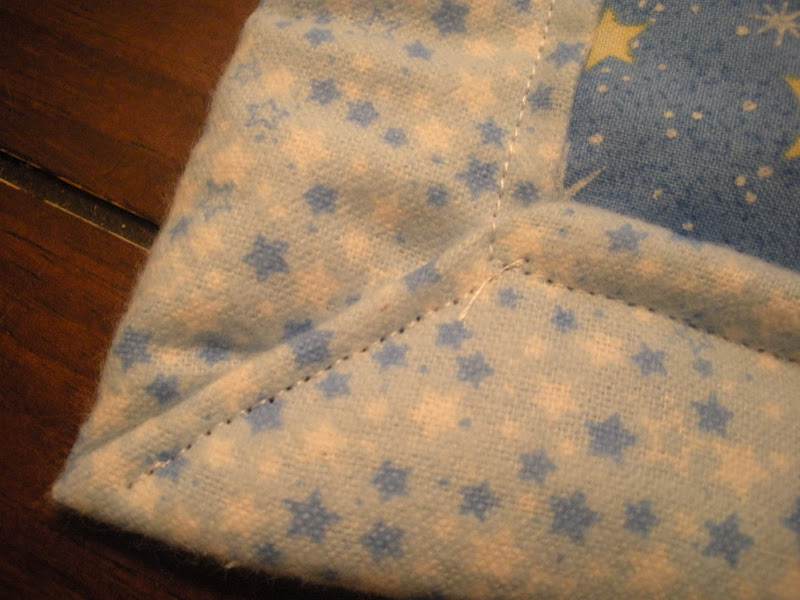
11. I laid out the piece and began to fold the backing over the top and pinned it into place. The first picture shows the first fold and the second picture shows the second fold and then pinned.


12. The corners can be tricky. I folded the corners at 45° angles and then did the second fold and pinned again. I made sure the fold lined up with the sides, keeping the trim even on all sides.


13. I sewed the folded trim all around the quilt and re-enforced the corners.
Viola!


SIDE NOTE - THIS IS MY 300TH POST!!!! (ONLY SINCE JULY 2011...WOW! I'M ADDICTED. =)
No comments:
Post a Comment